Tuesday, June 5, 2012

Why Fermented/Cultured Foods? Intro to Kombucha


Did you know that this food preservation method from times past produces foods that are more easily digestible, creates new nutrients including folic acid, riboflavin, niacin, thiamin, biotin, omega-3 fatty acids, superoxide dimustase, GTF chromium, glutathione, phospholipids and beta 1,3 glucans as a by-product of the microbial culture life cycle? (Katz 6-7) Let's not mention the digestive health benefits of live fermented foods, by helping to create and sustain thriving microflora in the gut that help prevent digestive related disease and illnesses.

Kombucha, referred to as "Immortal Health Elixir" in ancient Chinese times,  is just one of the variety of the live fermented foods/beverages you can enjoy and benefit from. Kombucha is produced by the fermentation of sugar sweetened black tea plus a symbiotic culture often referred to as the "mother" or "scoby". The "mother" is a culture of acetic bacteria and fungi and aids in the fermentation of the sweetened black tea to produce a powerfully nutritious and delicious cultured beverage.

Russian research at the beginning of the century, indicate that Kombucha has healthful properties that help improve resistance to cancer, prevent cardiovascular disease, promote efficient digestion, boost the immune system and reduce inflammation. As found by Santos and colleagues, Kombucha can help aid in the prevention of digestive disease caused by E.Coli and Staph typhi by inhibiting growth of these bacteria, seen in the presence of a significant inhibition halo zone (or presence of inhibited growth) between 20-25mm for E. Coli and 21mm for Staph typhi.  For more resources on a century full of research visit Gaia Organics Research.

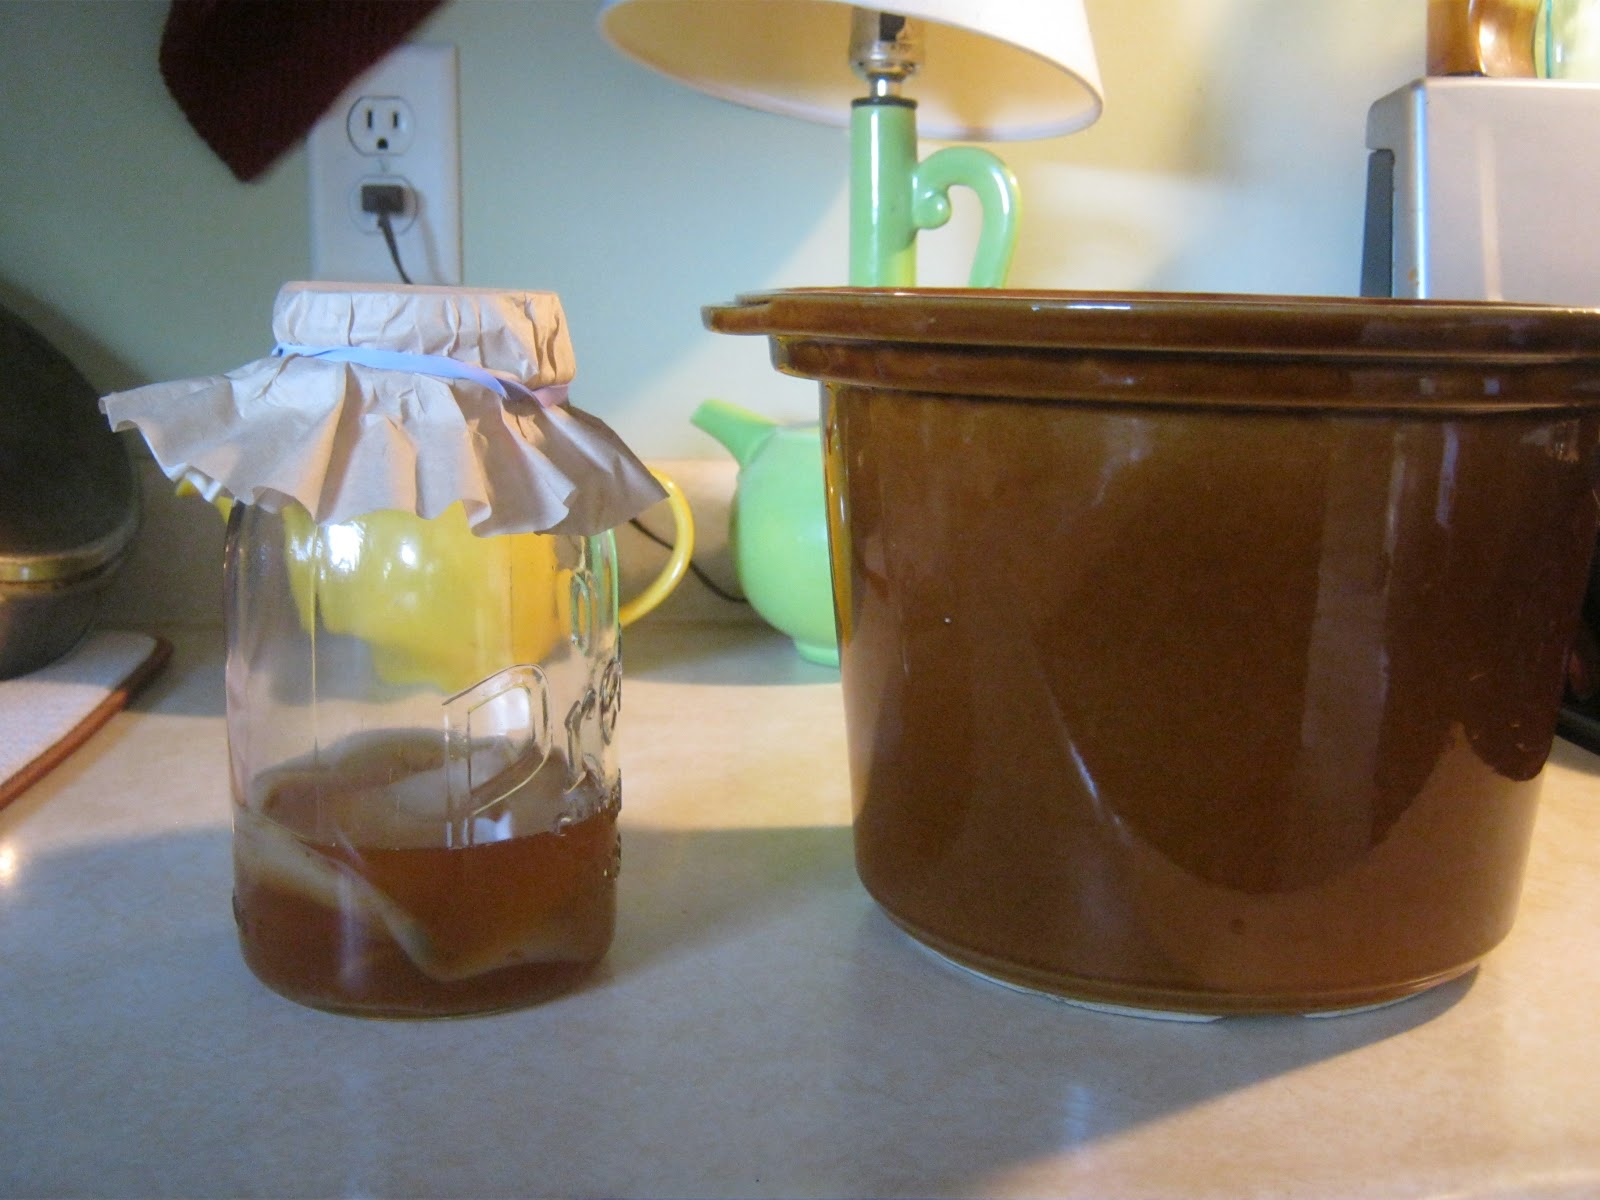
Basic Kombucha Recipe (as per Sandor Katz)
1qt/1liter water
1/4c suga/60mililiters sugar
1TBSP/15mililiters loose black tea or 2 tea bags
1/2c/125 mililiters mature acidic Kombucha
Kombucha Mother or Scoby

1. Find a scoby-try local health food stores, friends, wellness centers
2. Bring water and sugar to a boil, turn off heat and add tea (I put mine in a tea infuser and rigged it up to float in the pan). Steep ~15min.
3. Pour liquid into a wide glass container or crock, to allow adequate surface area of scoby to grow. Cool liquid
4. Add mature acidic kombucha, keep a portion of subsequent batches on hand for this purpose.
5. Place kombucha mother or scoby in the liquid with the firm opaque side up.
6. Cover with a cloth and store in a warm spot (ideally 70-85 degrees F). Let sit for a week or so, the longer it sits the more acidic it will become.
7. Store liquid in the refrigerator.
8. You will now have 2 mothers (the one you started with and a new one-the skin that formed on top of your new batch of kombucha). Use either to start a new batch, pass the unused mother down to a friend or compost it.
9. Drink, enjoy and be healthy!


Sources:
Katz, S. (2003). Wild fermentation: The flavor nutrition and craft of live-cultured foods. (1 ed.). White River Junction: Chelsea Green Publishing Company. DOI: www.chelseagreen.com

Santos Junior, R., Batista, R., Rodrigues, S., Filho, L., & Lima, A. (2009). Antimicrobial activity of broth fermented with kombucha colonies. Journal of Microbial and Biochemical Technology, 1(1), 72-78.


Tuesday, May 29, 2012

Cardio Training Intensity and Your Fitness Goals

What is "cardio"? In the fitness industry, cardiorespiratory training is activity that puts demand on the cardiovascular and respiratory systems in order to produce, sustain and recover from the activity. Basically if you are getting your blood pumping, you are cardiorespiratory training on some level.

What is intensity? Intensity in any kind of exercise training is, basically how much effort you are putting into your workout as compared to your maximum efforts. This can be measured in many ways, some ways are more appropriate than others depending on the training concept. For today, we're talking about "cardio" and a good indicator of your intensity during a cardiorespiratory workout is perceived exertion. Perceived exertion scales usually follow the Borg Rating of Perceived Exertion Scale which is a 6-20 scale (6 being no effort 20 being maximum effort), however are scaled down to a 1-10 scale for ease of use (1 being no effort at all 10 being maximum effort).

The Borg Rating finds a high correlation between perceived exertion multiplied by 10 and actual the heart rate during activity of that intensity level. (Borg, 1998). This, of course, is just a generalization and doesn't take into account all of the variables that affect heart rate (fitness level, medication, conditions that affect the cardiorespiratory system etc). For instance if you are exercising at intensity level 10 on the Borg Scale, your heart rate would be roughly 10x9 or 90beats per minute. This exercising heart rate is very light and your efforts "relatively" low, again this number is relative depending on the above variables. Perceived exertion comes in handy when you a) don't have a heart rate monitor handy or b) don't feel like stopping your activity to check your pulse rate. How well your body is conditioned will determine your perceived exertion for each activity.

From weeding the garden to running a race the possibilities of activities that challenge our cardiorespiratory systems are endless and you have the power to get the most (or least) out of your efforts by changing your intensity level during your activities. By increasing your intensity level during activity, you are telling your body to recruit more motor units (nerves stimulating muscle fibers to work). More motor unit recruitment means more muscle fibers working which also means more energy required to produce and sustain those contractions. More energy required can mean more calories expended during that particular exercise effort. If your fitness goal, for instance, is weight loss increasing your intensity level to maximize the amount of energy expended works to your advantage! It can mean a difference of hundreds of calories burned during one bout of exercise.

How can you increase your intensity? It all depends on the exercise

  • Involving more muscle groups per activity is usually a good start. A jumping jack for instance, intensity is increased when you add arms movement to the leg movement. Starting with just legs is a great place to start add arms when you're feeling ready to take things up a notch. 
  • Intentional movement, making those movements count...flopping arms around will require less muscle work than intentional, defined arm movement. Small movements will require less energy than large movements. Squatting and standing up without focusing on muscle contraction will require less energy than squatting and squeezing the quads and glutes when you come back up. As founder of the willPower Method®, Stacy Lei Krauss says "defined movement produces defined muscles", I couldn't agree more. Make those movements count!
  • Add a jump or a kick to your step
  • During slower tempo exercise, create fuller range of motion (this is also good for joint mobility)
  • Contract muscles when you can both concentrically (shortening the muscle) and eccentrically (elongating the muscle from shortened state).
  • Smile (a smile produced by the contraction of 17 muscles, burn extra calories just by smiling:)-my personal favorite!   

Wednesday, April 11, 2012

Empowering You and Your Growing Baby

Inside you is an innate wisdom that intuitively understands about the very natural process of birth. We help you reconnect with this wisdom, guiding you through a class specifically designed for the journey of pregnancy.  Linking yoga postures with the breath will lead you to new discoveries, bringing awareness to the mind, body and spirit, and also the spirit of your baby. The program, conducted in a calm, peaceful environment will help strengthen the uterus and pelvic muscles, improve circulation, aid in digestion, exercise the spine, relieve fatigue and tension and increase overall comfort. 

Yoga can also alleviate many of the discomforts of pregnancy such as nausea, constipation, swelling, back pain and sciatica. Breathing techniques will be practiced. This allows the chest to open and helps to improve circulation in both mother and baby, ensuring a better supply of oxygen to the blood.  It also calms the nerves and gives the mother greater control of her breathing during labor.  Prenatal yoga keeps the body healthy and flexible.  A safe, open community allows you to freely discuss any issues, from discomforts and concerns, to the wonderful new changes your body and baby are experiencing.
~Nicole Cummings Prenatal Yoga Instructor at Empowered Wellness Rochester MN
 
Safety Guidelines
All pregnant women are welcome to attend the class, whether you have a regular practice or want to start yoga during pregnancy. No prior yoga experience is required.  It is very important to inform the teacher of any complications (current or past) or any treatment that you are receiv
ing.

Saturday, March 31, 2012

FOUNDATION 1: Working Your Core, What Does it Mean?

Foundation training at Empowered Wellness, what is it? We believe in the importance of building a strong foundation of stabilization, balance and flexibility in order to be more effective in your exercise efforts, day to day living, sports events and competitions etc.  Foundation training includes: Core Stabilization, Balance Training and Flexibility

We've all heard the hype about the importance of working your core, how it will help you produce better movement and will help with posture and balance. Many misconceptions around working your core arise when we see workout videos and media stating we're working our core when we're doing crunches, v-situps, side crunches. These exercises are working the mobilizer muscles within your core but don't necessarily target the more important stabilizer muscles that work to stiffen the spine and keep the spinal column protected  by limiting excessive micromotion between intervertebral junctions, while your body produces movement. 

What are Core Stabilizers and Core Mobilizers?
Core Stabilizers:
Transverse Abdominis
Internal Oblique
Lumbar Multifidus
Transversospinalis
Pelvic Floor
Diaphragm
Core Mobilizers:
Latissimus Dorsi
Erector Spinae
Hip Flexors
Hamstrings
Hip Adductors and Abductors
Rectus Abdominus
External Obliques

While the stabilizers and mobilizers work in harmony, they aren't always balanced and many traditional exercise programs had worked to target the mobilizers BEFORE the stabilizers or worse yet...not targeting the stabilizers at all. What's the result? Pain and Injury throughout the kinetic chain (believe it or not, having a weak core can lead to headaches, knee pain, foot pain and low back pain).

Where to start?
There are many basic exercises you can do to target your core stabilizers, many of which will start you out at a slow steady pace to help you recognize these muscles, build endurance and help train these muscles for the physical demands of an increased work load as you progress to more challenging core training exercises. Some of these exercises include: standing core stabilization-draw in maneuver or pulling in the area just below your naval, straight arm circles, single leg balancing, floor exercises cat cow stretch, opposite arm/leg reach and balance, prone cobras, floor bridge and planks. 

Most of these exercises can be done without the use of equipment and can be done wherever you go, at home, at the office, on vacation. It's wise to consult a fitness professional and your health care provider before starting a new exercise program. Once you have the clearance from your provider and the help from a fitness professional who can help you establish a routine and good form, you'll be well on your way to building a strong foundation!


Wednesday, February 22, 2012

Katie's Wholesome Delicious Granola Recipe

Granola:

3c old fashioned oats
3/4c flour (wheat or white will do)
1/4c wheat germ and/or flax meal
1c chopped nuts of your choice ( I like walnuts and almonds)
1/4c brown sugar (light or dark, or omit if you want less sweetened granola)
1/2c maple syrup (or honey)
1/2c coconut oil


Mix dry ingredients well. Whisk together oil and syrup. Add wet ingredients to dry and mix well with hands. Bake on a cookie sheet in a ~1/2in layer in an oven set at 250F, for 1 hour (stirring about half way through). Take out and let sit for about 5min, mix in dried fruits after baking (optional).  Store in an airtight container on the counter. Eat, drink and be merry!

Tuesday, February 21, 2012

The Body's Guide to Functioning Efficiently and Achieving Fitness Goals

A bonfire burns most efficiently if its structural integrity is intact~KBS

Two keys here: surface area, and airflow. To catch a flame (and especially a spark) you need as much surface area as possible for your flame to catch (which is why newspaper works so well.) But you also need air to be able to circulate and get to where the flame is. If you need a reason, look up oxidation. In a fire, cool air has to come in from the bottom to replace the hot air escaping from the top. Keep that in mind when building any fire.

Thank you berZirker for your Instructables and insight on how to build a bonfire

Over the course of my Masters work and as I began to understand more about human movement science and exercise science, I immediately started brainstorming ideas on how I could bring that knowledge to my community to help people move better, move pain free and reach their fitness goals in a healthy sustainable way. I'm a firm believer in doing things right the first time, even if that means taking the longer path. Usually the longer paths are well established and are strengthened by the interconnecting routes, building strong established paths take time! There are no quick fixes that are made to stand the test of time after all.

What is it about a bonfire that will help you achieve your fitness goals? The bonfire is an analogy I came up whilst out on a run, pondering ways to present this at an upcoming wellness workshop at Empowered Wellness. After a season of building fall afternoon bonfires in the backyard, I thought of how a bonfire is constructed and how it burns, why if you build it right it takes off in a blaze of glory and if you don't pay attention to details you'll easily end up with a bonfire that smolders and peters out.

So here's the analogy, consider these two scenarios
1) You throw a heap of wood into your fire pit and light a match to it. What happens? It does nothing, maybe the few of the outer splinters ignite then quickly die off. You decide to stuff some newspaper into the mix, the paper ignites the smolders and goes out. You bring out the big guns-the jug of gasoline (what I like to think of as fad diets and quick fix synthetic miracle fat burning, muscle building, energy boosting powders, pills, bars etc). What happens? It lights off like a rocket, you see results, you get excited until it too eventually smolders and dies out.

2) You crumple up a ball of newspaper, gather up your tinder (twigs, shaved wood, dried leaves, paper, bark, grass, dried pine needles, broken up pine cones etc), then your small kindling (small dry sticks) and medium kindling (wrist sized sticks) and logs (your fuel source). With the tinder in the center, teepee the small and medium kindling around the tinder and longs on top for a larger teepee with enough airflow and surface area to oxygenate the fire. Light the match and watch your masterpiece blaze! How does this relate to your body's ability to function and burn fuel? 

Consider a body who's spinal alignment is out of whack from injury, overuse movements, prolonged sitting in front of a computer monitor...the list goes on. The malalignment of the spine is symbolic of the heap of logs thrown into the fire pit. When the spine is out of alignment, the muscles that support and move the spinal column become imbalanced (weak in areas where they are not being used or are being compensated for creating overactive/tight muscles). This is often combined with a weakened intrinsic core stabilization system (not talking the 6 pack abs, I'm talking the small muscles that stiffen your spine protecting the nervous system while the larger mobilizers work to move your trunk and limbs-think transverse abdominis, multifidus, transversospinalis, internal oblique and pelvic floor muscle). 


Without the structural integrity of the spinal column intact, the nervous system becomes inefficient. With decreased neural stimulation to the muscles, muscles become inhibited, weakened, prone to injury susceptible to altered force-coupled relationships between muscles that work synergistically to produce movement (ie, weak muscles become weak, and their supporting and/or opposing muscles pick up for the slack and become overactive) thus fueling the muscle imbalance and malalignment. 

Why is this important? Whether your fitness goal is to move without pain, lose that spare tire around your waist, run a marathon or increase your overall strength, if you're neuromuscular system isn't functioning efficiently (those nerves aren't efficiently and effectively reaching those muscles) your efforts may be hindered. For instance, more neural input to muscles, means more muscle fibers recruited, means more energy required to fuel those muscles (fuel means more calories), more calories burned means improved metabolic function resulting in decreased fat mass. 

Let your hard work and efforts mean more, get those imbalances in check (pay a visit to an NASM CPT and CES for Personal Training with a focus on corrective exercise), strengthen your core, work on realigning your spine through strength, stretching, breathing and posture, perhaps visit a chiropractor. Fuel YOUR fire, ACHIEVE your goals, LIVE your dreams!


Monday, February 6, 2012

Thick and Creamy Homemade Yogurt


Ingredients:
1qt milk (this recipe works well with 1%, 2% or whole milk)
1/2c powdered milk
2T plain yogurt (with live cultures)

Directions:

Pour a quart of milk and 1/2c powdered milk into a heavy bottom saucepan. Lately, I've had lots of success with my cast iron dutch oven. I can do everything all in one pot, less to clean up afterward.

Heat milk over medium-low heat until it reaches 180 F degrees, stirring constantly to avoid burning the milk on the bottom of your pan. Remove from heat and cool to 110-115 F degrees 
Scoop out about 1/2 cup of the warmed milk and in a Pyrex or bowl and add 2T room temp plain yogurt (any plain yogurt will do, Greek yogurt makes for a wonderful yogurt. Make sure your yogurt culture has plenty of active live cultures in it for optimal results). Whisk together, add the yogurt milk mixture to the warmed milk in the saucepan and whisk thoroughly. 

Pour mixture into a quart sized Mason jar, cover tightly then place the jar in a warmed crock (I let mine heat up on low for about 30min, then unplugged it). The crock will have to be sealed to keep the heat in, so if you have a shorter crock, you may have to lay your mason jar horizontally.

Wrap the crock with a thick towel and a fleece blanket to keep it warm OR if you are heating your milk in a cast iron dutch oven, you can mix everything in the dutch oven, wrap it and leave it to culture OR if you have a large enough food dehydrator you could place your mason jar directly into the dehydrator and set the temperature at around 105 F.  Let yogurt sit bundled up in blankets overnight (or for 8-10hrs, the longer it sits the more tart it is, I've made it in as little as 7hrs and it's very mild but still thick).Unbundle your yogurt after it's done culturing, store in the fridge.
 Add sweeteners, flavors, jams (strawberry rhubarb jam swirled in is wonderful), granola upon eating! Bon Appetit!